The iPhone has evolved into a powerful tool for capturing high-quality audio, video, and voice recordings. Whether you need to record interviews, lectures, meetings, or personal voice memos, the iPhone offers plenty of features to help you achieve professional results. Recording on an iPhone is simple, but with the right tips, settings, and apps, you can take your recordings to the next level.
In this blog, we’ll walk through how to record audio, video, and screen content on your iPhone, and share some best practices to ensure your recordings are of the highest quality. We’ll also introduce VOMO AI, an AI-powered tool that can help you manage your audio recordings by providing automatic transcription, Smart Notes, and more.
1. How to Record Audio on iPhone Using Voice Memos
For most users, the Voice Memos app on the iPhone is the easiest and most efficient way to capture high-quality audio. This app comes pre-installed on all iPhones, making it quick to access and use.
Steps to Record Audio Using Voice Memos:
-
Open the Voice Memos App: Find the Voice Memos app on your iPhone (it’s pre-installed) and open it.
-
Tap the Record Button: Simply tap the red record button to start recording.
-
Adjust Microphone Settings: For better quality, position your iPhone close to the source of the sound and ensure you’re in a quiet environment. The iPhone’s built-in microphone is sensitive, so minimizing background noise will improve clarity.
-
Pause and Resume as Needed: You can pause the recording at any time by tapping the red button again and then tap it once more to resume.
-
Save the Recording: When you’re done, tap the Done button, name your recording, and save it.
The Voice Memos app allows you to trim your recordings, rename files, and share audio clips via email, messaging apps, or cloud services like iCloud or Dropbox.
Best Practices for High-Quality Audio:
-
Use an External Microphone: For even better sound quality, consider using an external microphone such as the Shure MV88 or Rode SmartLav+. These can connect to your iPhone via the Lightning port and offer clearer audio with less background noise.
-
Record in Quiet Spaces: Ensure that your environment is as quiet as possible to avoid interference or background noise. You can also enable the Noise Cancellation feature in the Settings > Accessibility > Audio/Visual section.
2. How to Record Video on iPhone
Recording video on an iPhone has never been easier, and the device’s impressive camera quality makes it a great tool for shooting high-resolution video.
Steps to Record Video Using the Camera App:
-
Open the Camera App: Launch the Camera app on your iPhone.
-
Switch to Video Mode: Swipe left or right to select Video mode.
-
Tap the Record Button: Press the red circle to start recording. You can zoom in or out by pinching the screen.
-
Use Focus and Exposure Control: Tap the screen to adjust focus, or press and hold to lock exposure and focus on a specific object.
-
Stop Recording: Tap the red button again to stop recording.
Tips for Better Video Recordings:
-
Use a Tripod: To avoid shaky footage, invest in an iPhone-compatible tripod, such as the Joby GorillaPod, to stabilize your recordings.
-
Enable 4K: For the best quality, go to Settings > Camera > Record Video and select 4K at 30 or 60 frames per second (fps), depending on your preference.
-
Lighting: Ensure that you have sufficient lighting, as this can greatly affect the quality of your videos. Natural light is best, but you can also use ring lights or softbox lighting for indoor recordings.
3. How to Record Your iPhone Screen
Recording your iPhone screen can be useful for creating tutorials, documenting bugs, or sharing app demonstrations. This feature is built into the iPhone and can be easily enabled.
Steps to Record Your Screen:
-
Enable Screen Recording in Control Center:
-
Go to Settings > Control Center > Customize Controls.
-
Tap the green plus icon next to Screen Recording to add it to the Control Center.
-
-
Start Recording:
-
Open Control Center by swiping down from the top-right corner (or up from the bottom on older iPhones).
-
Tap the Screen Recording button (circle icon).
-
A 3-second countdown will begin, after which your screen recording will start.
-
-
Stop Recording:
-
To stop recording, either tap the red status bar at the top of your screen and hit Stop, or open Control Center again and tap the Screen Recording button.
-
-
View Your Recording:
-
Your recording will automatically be saved to the Photos app, where you can view, edit, and share it.
-
Best Practices for Screen Recording:
-
Do Not Disturb Mode: Enable Do Not Disturb to prevent notifications from interrupting your recording. Go to Settings > Do Not Disturb or swipe into Control Center and tap the crescent moon icon.
-
Editing Tools: You can trim the start and end of your screen recordings using the Photos app by selecting Edit.
4. Managing and Transcribing Your Recordings with VOMO AI
While the iPhone offers a wide range of recording options, managing and making sense of your recordings—especially audio—is where VOMO AI comes into play. If you often record meetings, interviews, or lectures, VOMO AI can save you hours by transcribing your recordings automatically and providing actionable insights through Smart Notes.
Key Features of VOMO AI:
-
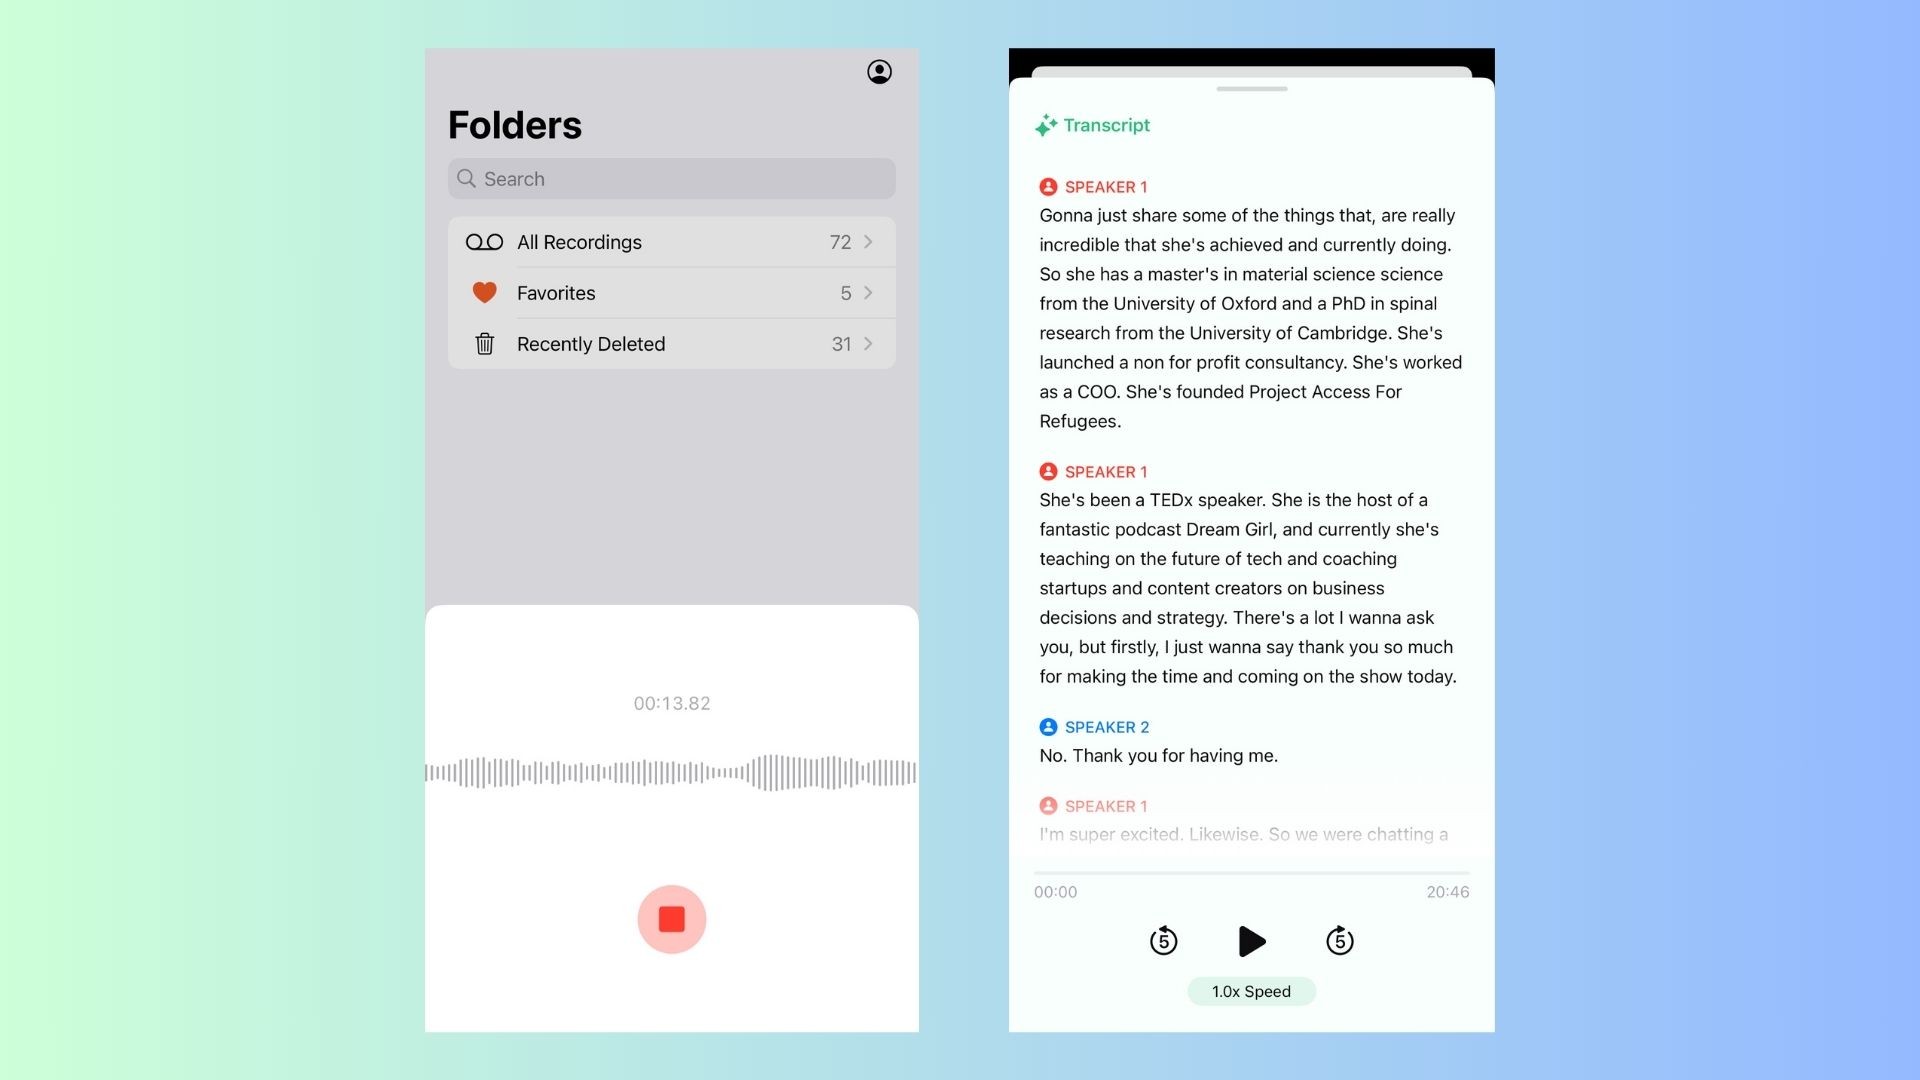
Accurate Transcription: VOMO AI uses advanced speech-to-text technology to provide highly accurate transcriptions, making it easy to turn your audio recordings into text.
-
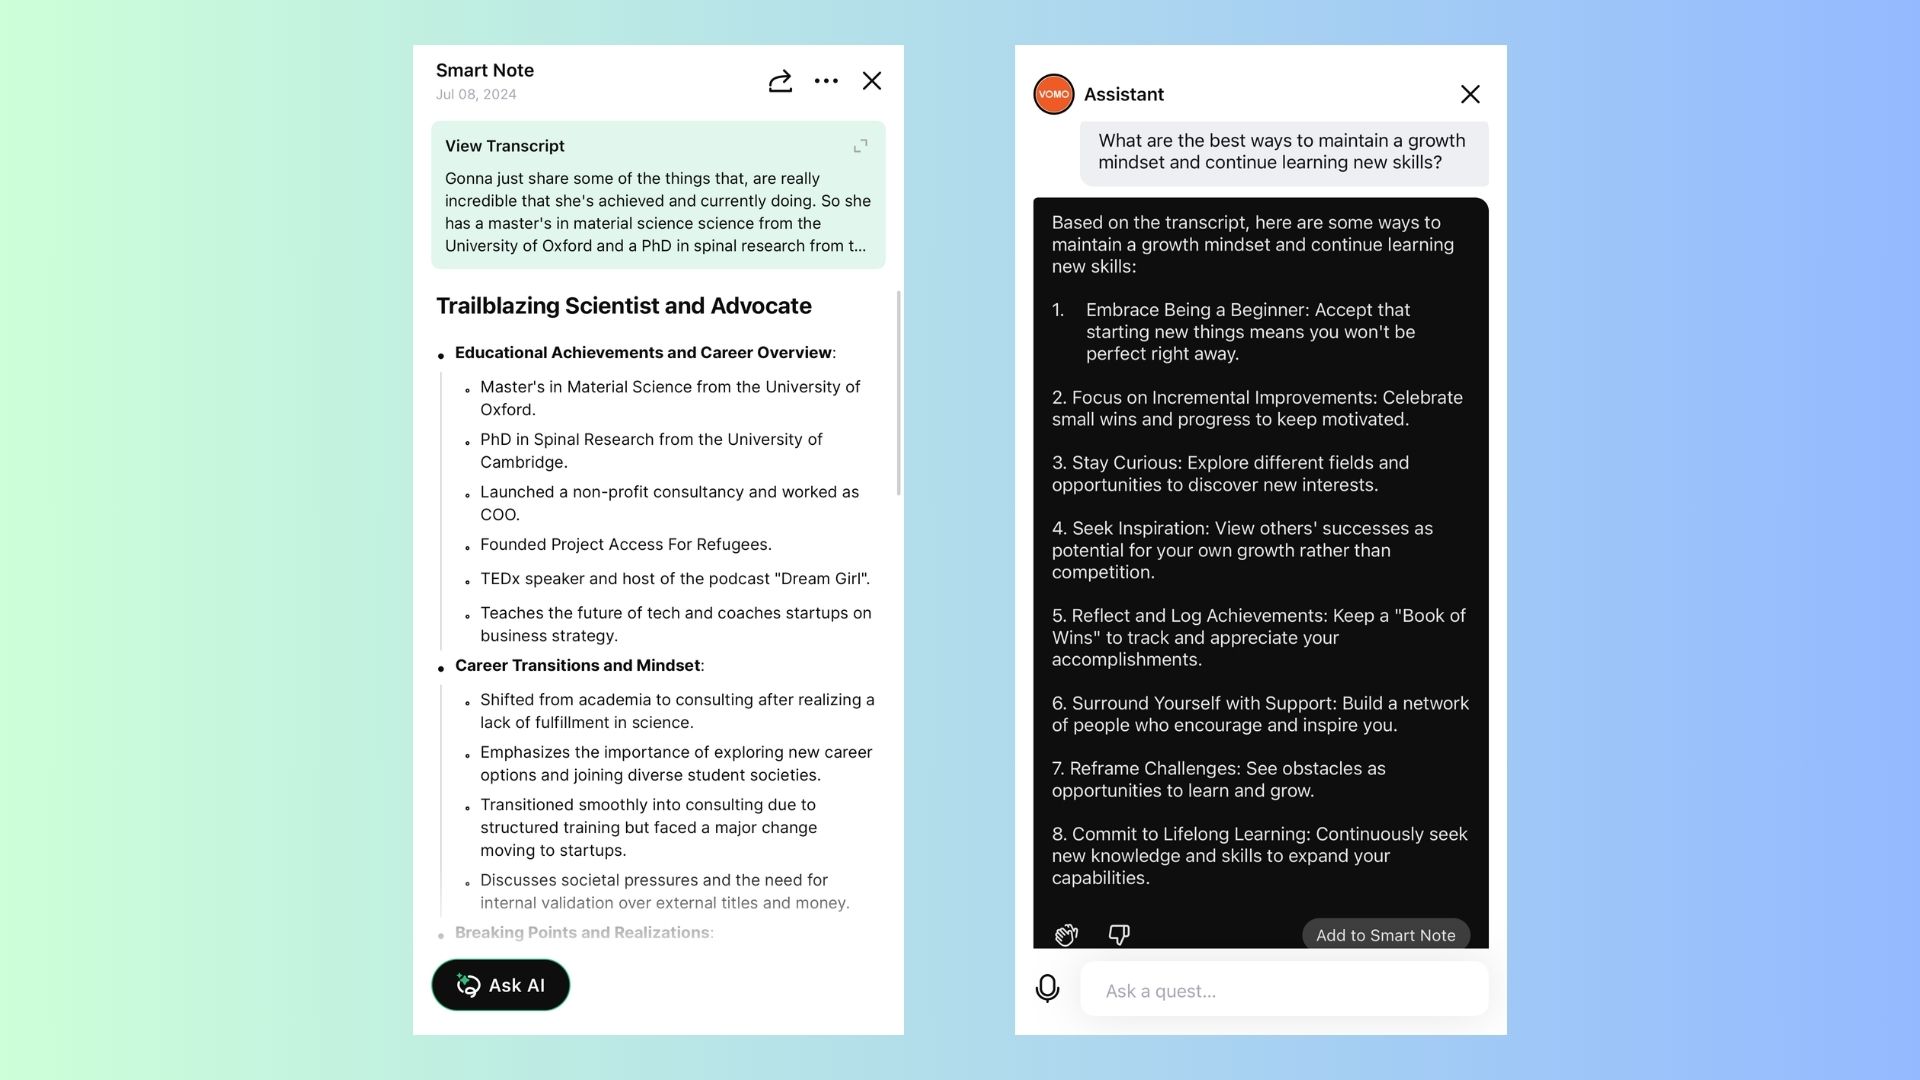
Smart Notes: VOMO AI automatically generates Smart Notes—summarized key points from your recordings. This is incredibly useful for reviewing meetings or lectures, as it gives you an instant overview without needing to listen to the entire recording.
-
Ask AI: VOMO AI’s Ask AI feature allows you to interact with your transcript by asking questions. For example, you can ask for the key takeaways from a meeting or clarification on specific topics, making the review process fast and efficient.
-
Multi-Language Support: Whether you’re recording in English, Spanish, or any of the other 50+ supported languages, VOMO AI can transcribe and analyze recordings in your preferred language.
-
Cloud-Based Storage: VOMO AI securely stores your recordings and transcriptions in the cloud, allowing you to access them from anywhere and share them with others via shareable links.
How to Use VOMO AI:
-
Record Audio: Use the Voice Memos app or VOMO AI app on your iPhone to capture your audio.
-
Upload to VOMO AI: Import your audio files into the VOMO AI app, and it will automatically transcribe the recording for you.

-
Review Smart Notes: Access the Smart Notes generated by VOMO AI for a quick summary of the key points from your recordings.
-
Ask Questions: Use the Ask AI feature to inquire about specific details from the recording, making it easy to extract the most important information.
By integrating VOMO AI into your workflow, you can easily manage, transcribe, and make sense of your recordings, especially if you regularly deal with long meetings or interviews.
Conclusion
Recording audio, video, and screen content on your iPhone is straightforward, thanks to the device’s built-in features and powerful hardware. With a few simple tips and tricks, you can significantly improve the quality of your recordings. And by using tools like VOMO AI, you can take your workflow even further by transcribing and organizing your recordings, saving you time and effort.
Whether you’re a student, a professional, or a content creator, combining your iPhone’s recording capabilities with VOMO AI’s transcription and Smart Notes features will make managing and utilizing your recordings much more efficient. So why not try VOMO AI today and see how it can transform the way you work with recordings?
