If you’re wondering whether you can transcribe in DaVinci Resolve, the answer is yes. Starting with version 18.5, DaVinci Resolve introduced a built-in transcription feature that lets you automatically generate subtitles from your audio tracks. This makes it easy to convert spoken words into text directly inside your editing workflow.
What Is Transcription in DaVinci Resolve?
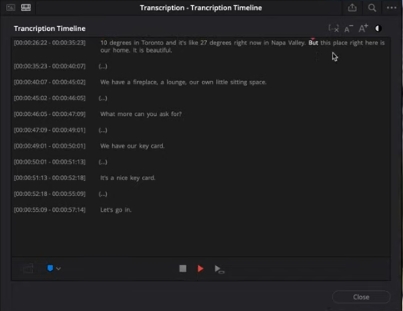
Transcription in DaVinci Resolve is the process of turning speech from your clips into on-screen text. By using the software’s AI-driven subtitle generator, editors can quickly produce captions or transcripts without leaving the program. This streamlines workflows and eliminates the need to manually type out dialogue.
How to Transcribe Audio in DaVinci Resolve
Method 1: Transcribe Directly from the Media Pool
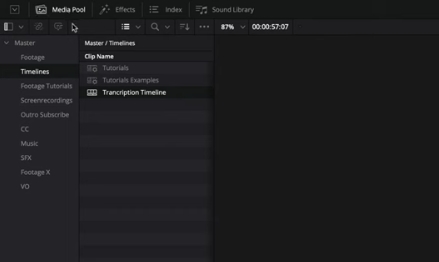
One of the fastest ways to generate transcripts in DaVinci Resolve is by starting directly from the Media Pool. This option is ideal when you want to prepare subtitles before editing your clip on the timeline.
Steps to transcribe from the Media Pool:
- Open the Media Pool – In DaVinci Resolve, locate the Media Pool panel where your imported files are stored.
- Select a clip – Right-click on the audio or video clip you want to transcribe.
- Start transcription – From the context menu, choose Transcription audio and then click Transcrire.
- Wait for processing – A progress bar will appear as Resolve processes the file. Depending on your computer’s performance and the clip’s length, this may take a few minutes.


This method is especially useful if you need de l'audio au texte conversion early in your workflow.
Method 2: Transcribe from the Timeline with AI Tools
If you’re already editing on the timeline, you can use DaVinci Resolve’s Outils de transcription alimentés par l'IA to generate subtitles directly from your sequence.
Steps to transcribe from the timeline:
- Go to the timeline – Make sure you’re working on the Edit page with your media placed on the timeline.
- Access AI tools – From the top menu bar, click on Timeline.
- Create subtitles – Select Outils d'IA, then choose Create Subtitles from Audio.
- Adjust settings – A pop-up window will appear. Here, you can select the language, set the minimum line length, and customize other subtitle options. Once ready, click Créer.
This method is perfect for editors who want to automatically align subtitles with their timeline edits, creating smooth de la vidéo au texte transcription within the project.
How to Edit and Refine Transcripts
After generating the subtitles, you can fine-tune them in the Subtitle Track. Here you can:
- Correct misheard words.
- Adjust timing to match the speaker’s voice.
- Style the text with fonts, colors, and positioning.
This ensures your final transcription is accurate and professional.
Exporting Transcripts for Other Uses
DaVinci Resolve doesn’t just generate captions—you can also export them. This is useful if you want a standalone transcript for documentation, translation, or content repurposing.
To export, right-click the subtitle track and choose Export Subtitles. You can save the file in standard formats like SRT or TXT, making it easy to use across different platforms.
Alternatives for More Advanced Transcription
While DaVinci Resolve offers a strong built-in solution, some editors may need advanced features like multi-language support, speaker identification, or integration with other tools. In these cases, using specialized de la vidéo au texte software or third-party Transcription de l'IA apps can provide more flexibility and accuracy.

Réflexions finales
Learning how to transcribe in DaVinci Resolve is straightforward and a huge time-saver for editors. With just a few clicks, you can generate subtitles, refine them, and even export them for wider use. Whether you stick with Resolve’s native tools or enhance your workflow with third-party transcription apps, this feature helps streamline video editing and makes your content more accessible.


