#
Record Audio on iPhone
How to Record High-Quality Audio on iPhone in 2025
May 7, 2025
Recording crisp, studio-quality audio on an iPhone is entirely possible in 2025 with the right techniques and tools. Whether you’re a content creator, podcaster, student, or professional, your iPhone can double as a portable sound studio. In this how-to guide, we’ll walk you through the updated process of recording high-quality audio on an iPhone, share tips to improve recording quality (from microphone tricks to environment setup), and highlight the best apps to use. We’ll also introduce VOMO AI – an AI-powered solution that can take your voice recordings to a professional level. By the end, you’ll know how to get the best sound and be ready to try out VOMO AI to enhance your recordings.
Why High-Quality Audio Matters (Even on an iPhone)
Clear, high-quality audio is essential for engaging content. Viewers and listeners are quick to tune out if your audio is muffled or noisy . Even with great visuals, a video with poor sound can seem unprofessional . By investing a bit of effort into recording better audio on your iPhone, you’ll stand out with content that sounds as polished as it looks. Fortunately, today’s iPhones come with advanced microphones and software features that make quality recording easier than ever.
Tip: Newer iPhones have multiple built-in microphones (for stereo sound and noise cancellation) to help capture audio clearly . This means the device in your pocket is capable of much more than basic voice memos – it can be a serious audio recorder with the right approach.
Getting Started: iPhone Audio Recording Basics in 2025
Every iPhone comes with Apple’s built-in Voice Memos app pre-installed, which offers a user-friendly interface and essentially unlimited recording time (only limited by your storage) . There’s also Apple’s GarageBand, a free app for multi-track recording and editing, which is great for music or complex projects. For most people, Voice Memos is the quickest way to capture a voice recording:
• High quality by default: The iPhone’s mics can record voice with surprising clarity. Voice Memos uses a compressed audio format by default, which sounds good for notes, but you can switch it to lossless for even better quality (more on that below).
• New features: As of iOS 17 and beyond, Voice Memos includes an Enhance Recording option – a one-tap feature that uses on-device machine learning to reduce background noise and room echo . We’ll cover how to use this in a bit.
• Limitations: The built-in apps don’t offer pro features like detailed EQ or AI cleanup (beyond the basic enhance tool). This is where third-party apps and tools like VOMO AI come in handy for achieving studio-quality results.
Before exploring advanced tools, let’s go through the step-by-step process to record audio on your iPhone using the native app.
How to Record Audio on Your iPhone (Step-by-Step)
Recording audio on an iPhone is straightforward. Here’s how to do it using the Voice Memos app:
Open the Voice Memos app: On your iPhone home screen, find the Voice Memos app (it’s installed by default). If you can’t locate it, swipe down and search for “Voice Memos,” or ask Siri to open it .
Prepare to record: Before recording, consider putting your phone in Airplane Mode or Do Not Disturb to mute notifications and prevent interruptions. Also, make sure your fingers aren’t covering the microphone holes (usually at the bottom edge of the phone).
Press the red Record button: Tap the large red Record button to start recording. You’ll see a waveform and a timer indicating that audio is being captured . Speak clearly toward your iPhone. You can leave the app open, or even switch to other apps – Voice Memos will continue recording in the background.
Pause or finish the recording: If you need a break, tap the Pause button (the Voice Memos app lets you pause without ending the session). Resume by tapping the red button again. When you’re done, tap the Stop button (the red square) to finish the recording.
Name and save your recording: After stopping, your new audio clip will appear in the list (named “New Recording” by default). Tap on the name to rename it something descriptive like Podcast Intro 2025 or Interview with Jane. Organizing your files now will help later.
Play back and trim if needed: Tap your recording to play it back. If there’s unwanted silence or noise at the start/end, use the Edit (✎) or trim function in Voice Memos – tap the recording, choose “Edit,” then drag the trim handles to cut out parts. This ensures you have only the audio you want.
(Optional) Enhance the recording: If you notice background noise or echo, you can try Voice Memos’ built-in Enhance Recording feature. Select your recording, tap the options (three-dot or slider icon), and toggle on Enhance Recording. This uses on-device ML to reduce noise and room reverberation . You might hear the difference in clarity immediately. (Note: If the effect sounds too subtle or makes the audio worse, you can toggle it off — the feature is non-destructive, so it won’t harm your original audio.)
Once you’ve recorded and saved your audio, you can share it by tapping the share icon (to send via email, Messages, or save to Files/Dropbox). At this point, you have a raw audio file from your iPhone. Next, let’s look at how to make that raw audio sound as high-quality as possible.
Best Voice Recording Apps for iPhone in 2025
In addition to Apple’s built-in tools, there are several third-party apps that cater to those wanting the best voice recording experience on iPhone. Here’s a quick overview of the top apps and what they offer:
• Voice Memos (Apple) – Built-in & simple. As discussed, it’s free and already on your iPhone. It offers basic trimming and now features like Enhance Recording and iCloud sync. It’s great for quick memos or simple recordings on the go . However, it lacks advanced editing or studio effects. Best for casual use or when you need something quick and easy.
• VOMO AI – AI-powered studio and transcript in one. (We’ll dive deeper into VOMO AI in the next section, because it’s a standout app in 2025 for anyone serious about high-quality voice recordings.) In short, VOMO AI combines high-quality audio recording with AI enhancements that can transcribe and elevate your audio in ways other apps don’t . It’s like having a recording studio and a smart assistant in your phone – ideal for content creators who want professional results without a complicated workflow.
• GarageBand (Apple) – Mobile studio. GarageBand transforms your iPhone into a mini audio studio. You can record multiple tracks (e.g. voice with background music), add effects, and mix on your phone. The audio quality is excellent and you have fine control over levels and EQ. The downside is that it’s a bit complex if you just want a single voice memo – it’s geared more toward music production or multi-track podcasts. Still, for power users, GarageBand on iPhone is a pro-grade tool in your pocket.
• Dolby On – Automatic enhancement. Dolby On is a free app designed to make recordings sound better automatically. You hit record, and the app applies Dolby’s audio processing which includes noise reduction, dynamic EQ, and volume optimization in real-time . It’s very useful for musicians recording demos, or creators who want a polished sound without manual editing. The app also has basic trimming and reverb effects, and can record video with enhanced audio as well. Dolby On is a top choice if you want one-tap audio improvement – though it may not give you as much control as doing things manually.
• Otter.ai – Transcription-focused recorder. Otter.ai is known for live transcription of meetings and lectures. It also records audio, but its strength is converting speech to text on the fly and identifying speakers. It’s handy if you want a written record of your audio (like meetings or interviews). The audio quality is decent, but Otter is used more for notes and transcripts than for producing a final high-quality audio file. (Keep in mind it requires an internet connection for the AI transcription.)
• Voice Record Pro – Feature-rich recording. Voice Record Pro is a long-standing third-party app that offers a ton of recording formats (like MP3, WAV, AAC), quality settings, and even built-in uploading to cloud services. It’s like a “Swiss army knife” for voice recording on iPhone. You can fine-tune bitrates, record in stereo, and even do some light editing. If you’re an audio enthusiast who wants more control than Voice Memos but not the complexity of GarageBand, this app is worth a look.
As you can see, there are plenty of options. You might end up using a combination: for example, recording in Voice Memos or Dolby On for simplicity, then using another tool to transcribe or edit. Next, we’ll focus on how VOMO AI works and why you might want to integrate it into your recording workflow to get studio-quality voiceovers and enhanced audio with AI.
Tips for Recording Studio-Quality Audio on iPhone
Capturing great audio is not just about hitting the record button – it’s also how you record. Use the following tips to elevate your audio quality to a professional level:
• Record in a quiet environment: Choose the quietest location you can. Background noises like fans, traffic, or hums can significantly degrade quality. Even the iPhone’s clever noise cancellation can’t completely fix a loud TV in the background. Aim for a silent room and pause noisy appliances if possible.
• Mind your microphone placement: If using the iPhone’s built-in mic, hold the bottom of the phone (where the primary mic is) toward you. Keep it about 6–12 inches (15–30 cm) from your mouth for a balanced sound – too close and you might get “pops” from your breath; too far and it may capture more echo . Speak loudly and clearly without yelling. If you set the phone down, use a tripod or stand to keep it stable and pointed at your face.
• Keep the mic clear and clean: Inspect the microphone openings on your iPhone. If they’re covered by a case, cloth, or debris, your audio will suffer. Ensure no fingers or case edges block them while recording. A quick wipe of the mic area can remove dust or lint that muffle sound.
• Use an external microphone (for the best quality): One of the quickest upgrades to your recording quality is an external mic . There are many iPhone-compatible microphones (wired or wireless) that plug in via Lightning or USB-C. For example, shotgun mics or lavalier mics can dramatically improve clarity and reduce ambient noise. External mics often have pop filters or windscreens that help cut down plosives (puffy P sounds) and wind noise. If you’re serious about studio-quality audio on iPhone, an external mic is a worthwhile investment.
• Mute notifications and alerts: A loud ding from an incoming text can ruin an otherwise perfect take. Before recording, switch to Do Not Disturb or Airplane Mode to avoid notification sounds or calls interrupting your session. This also helps you stay focused without distractions.
• Optimize your iPhone’s audio settings: By default, Voice Memos records in a compressed format (AAC) to save space. For the highest quality (such as recording music, voiceovers, or anything you plan to edit heavily), change this to Lossless. Go to Settings > Voice Memos > Audio Quality, and select Lossless . This setting records in a format that retains more detail (44.1 kHz, 16-bit audio, similar to CD quality) for a better sounding file at the cost of larger file size . (If you only need quick notes or have limited storage, the default compressed setting is fine. But for professional projects, always go lossless.)
• Do a test recording and adjust levels: It’s wise to do a short test – record a few seconds and listen back. Check if your voice is clear and loud enough, and that there’s no distortion (if you sound too “buzzy” or clipping, move the mic slightly further or speak a bit softer). You can also watch the waveform or level meter while recording: it should peak around the middle of the range, not flat-lining at the top. This ensures clean audio without clipping.
• Use a windscreen or pop filter if needed: If you’re recording outdoors or in a drafty room, wind noise can wreak havoc on audio. A small foam windscreen on an external mic (or even on the iPhone if you rig something up) will cut down wind rumble . For indoor voice recording, a pop filter (the mesh screen used in studios) in front of your mouth can reduce harsh “P” or “B” sounds. This is an extra step that can make your audio sound more polished, especially for voiceovers or singing.
• Leverage audio enhancements in apps: We mentioned Enhance Recording in Voice Memos – use it if you have some background noise. In GarageBand or other editing apps, you might find filters like noise reduction or EQ which you can apply after recording. These can help fine-tune your sound. And if you plan to edit on a computer later, don’t worry too much about perfection on the phone – focus on getting a clean, clear original recording.
By following these tips, you’ll eliminate most common audio issues. Now that you have great raw audio, which app or tool should you use to record and further refine it? Let’s compare some popular options available in 2025.
Using AI to Get Studio-Quality Audio: VOMO AI in Your Workflow
VOMO AI is a cutting-edge app that has been making waves in 2025 as a go-to solution for voice recordings, especially for professionals and creatives. What makes VOMO AI special is that it doesn’t just record sound – it uses artificial intelligence to enhance and leverage your audio in ways standard apps cannot. Here are some key advantages of VOMO AI and practical ways to use it:

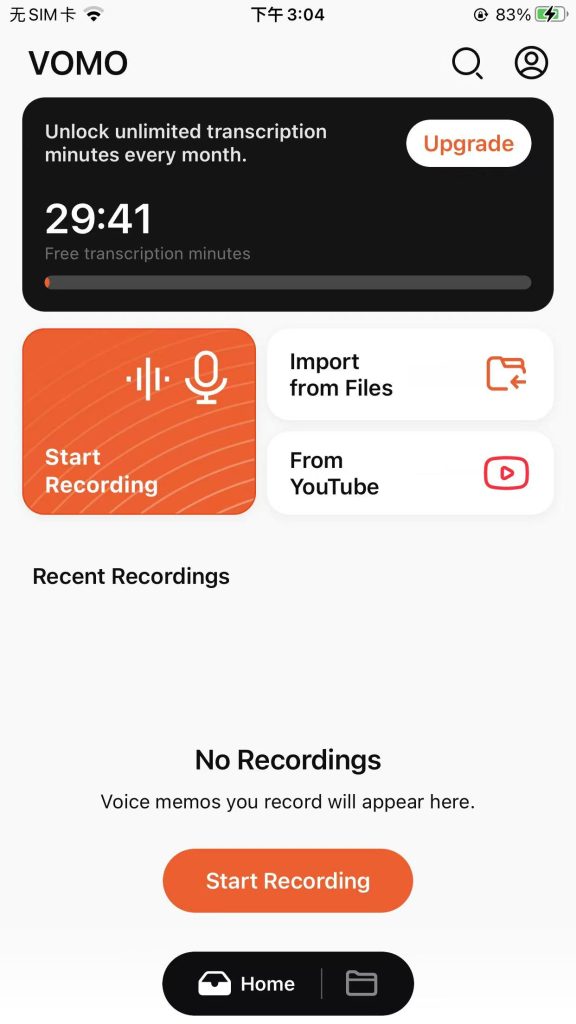
• Built-in high-quality recorder: VOMO AI has its own recording function, so you can capture audio directly in the app at crisp, clear quality . It’s designed to preserve clarity, so whether you’re recording a voiceover, a podcast interview, or a lecture, you get a great raw recording. (Of course, still follow the good practices – quiet room, external mic if available – to get the best input for the AI to work with.)
• Automatic transcription and Smart Notes: As soon as you finish recording, VOMO AI can transcribe your audio within moments. It uses OpenAI’s Whisper technology under the hood for very accurate speech-to-text. VOMO’s “Smart Notes” feature will even summarize the key points of a long recording . For a content creator, this means you could record a long take and let the AI highlight the best bits or outline the content for you. It’s like having a producer or script supervisor on hand.
• Ask AI for improvements or ideas: One unique feature of VOMO AI is the Ask AI assistant. After transcribing, you can literally query the AI about your recording – e.g., “summarize this in 2 sentences” or “what are the key takeaways?” . In a voiceover scenario, you might ask, “Is there any part where the sound quality drops or I stumble?” The AI might point out a section that had noise or a flubbed line, which you can then re-record. This kind of AI feedback loop can help you polish your audio content to perfection.
• Cross-device and cloud syncing: VOMO AI syncs your recordings and transcripts securely to the cloud, so you can record on your iPhone and then immediately access everything on your computer via VOMO’s web platform . This is great when you want to do further editing on a bigger screen or share the raw materials with a team. For example, you could record a voiceover on your phone, have it transcribed automatically, then quickly copy-edit the transcript on your laptop to use as subtitles or a blog post. All your data is kept organized and accessible.

• Use cases – from voiceovers to meetings: VOMO AI shines for a variety of scenarios. If you’re doing voiceovers for videos, you can record each script in VOMO and get a transcription to double-check against your script (to ensure you didn’t miss any lines). The high-quality audio plus the transcript makes it easy to correct mistakes – you can see exactly where to punch in a fix. For podcasters or interviewers, VOMO can handle long discussions, record in high quality, then give you a transcript and even summarize the conversation. This makes editing much faster, because you can search the text for the parts you want to cut or highlight. In fact, content creators have found that recording and transcribing voiceovers or podcasts streamlines the editing process, since you can reorganize and spot issues via text before finalizing the audio . Essentially, VOMO AI helps you record once and repurpose everywhere – use the transcript for captions, show notes, or articles, and use the cleaned-up audio in your final media.
When to use VOMO AI: Consider using VOMO AI when you want that extra level of polish or efficiency in your recording workflow. For instance:
• After capturing audio with Voice Memos or another app, upload the file to VOMO AI for AI enhancement and transcription . This way, you benefit from both worlds – maybe you liked Dolby On’s noise reduction during recording, and then VOMO’s AI can further transcribe and analyze it.
• Record directly in VOMO AI when you’re doing an important session like a professional voiceover, a remote class lecture, or an interview that you plan to turn into content. You’ll get the text and audio in one go, and you can immediately identify any sections to edit or re-record by reading the transcript.
• If you’re a perfectionist with audio, use VOMO AI as your post-production assistant. It can save you hours that you’d otherwise spend manually cleaning audio or transcribing for editing purposes. The result is clear, professional audio without the headache of complex editing software.
Finally, VOMO AI’s advantage is not just in making your audio sound good, but in making the process of creating high-quality audio easier. It’s like having an engineer and a secretary in your phone – one cleans up the sound, the other writes everything down for you.
Related Blog Posts
Never Take Notes Manually Again.
You focus on the meeting, while we handle the perfect notes.
Download VOMO today and get started for free!